Reperix quick setup guide
Version 0.7 – September 8, 2025
Working principle
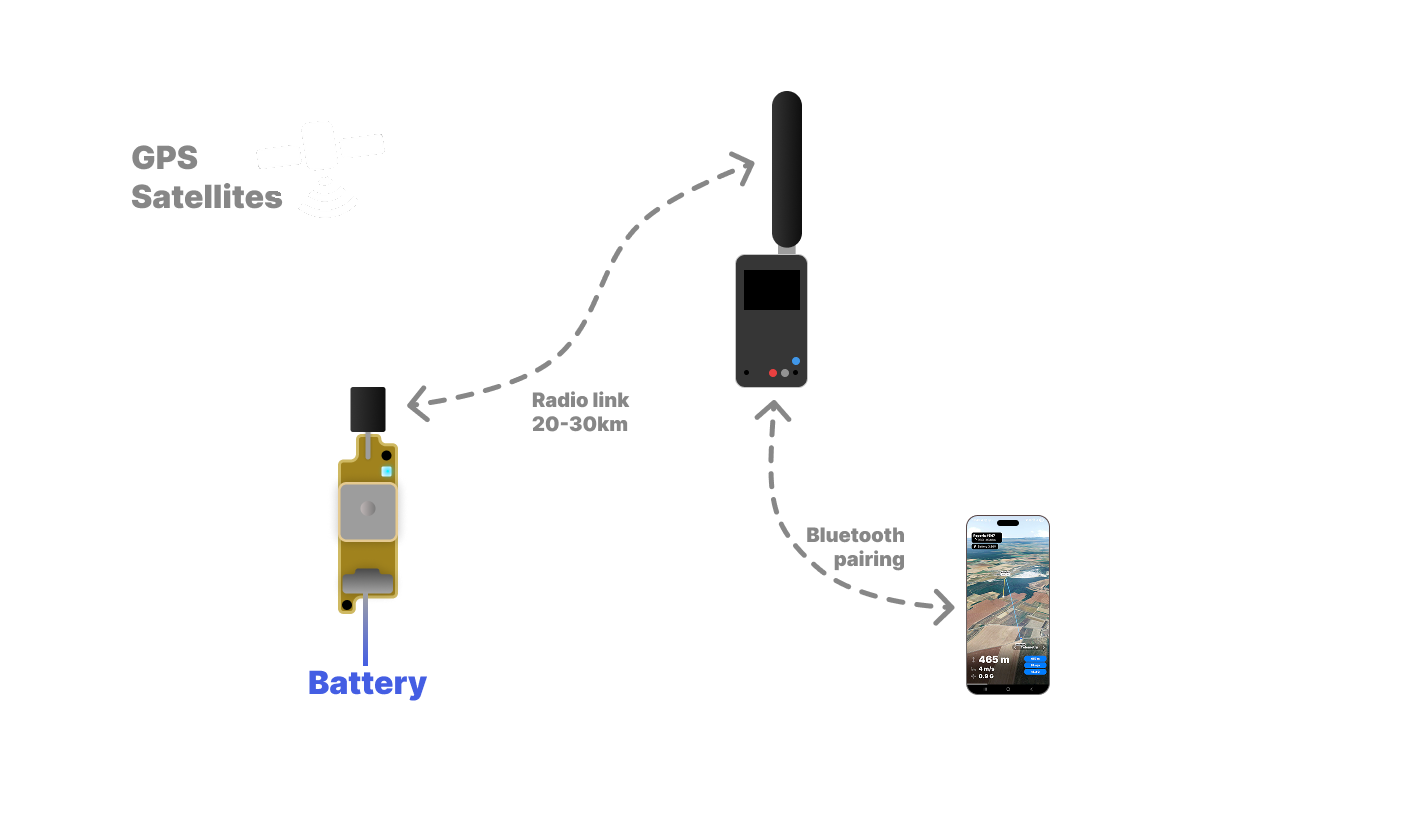
The Reperix Tracker is installed onboard a rocket to determine its position and transmit it to the ground in real time. During flight, the tracker locks onto signals from the GPS satellite network and gather data from on-board accelerometers and gyrometers to compute latitude, longitude, altitude, and velocity. This data is then sent via a built-in long-range radio link.
On the ground, the SteadyBlue station receives these transmissions and bridges them over Bluetooth to the companion app, running on a phone. The app displays live 3D position and trajectory, speak telemetry informations aloud, stores data and will guide you to your rocket to simplify recovery after landing.
Features overview
Show features
Long-range radio communication
with a ground station and a mobile application,
for tracking, telemetry and remote configuration.
High-rate BlackBox
logging your rocket’s precise 3D trajectory, orientation and more.
Full 3D inertial navigation
Say goodbye to COCOM’s 500m/s speed limit on traditional GPS systems!
Reperix embeds 9 different inertial sensors that precisely measure and send you your rocket speed, orientation and altitude even when GPS is blacked out due to legal restrictions.
Up to ±200G and ±2000°/s
Ultra compact and convenient format
- Measuring down to 40 by 12mm for 6 grams
It really is the world’s smallest GPS rocket tracker ! - M2 breakable mounting tabs
- Overall status LED indicator
- Wide input voltage ranging from 3.2 to 16 volts
High end UBlox™ GNSS
calculating the position and altitude of your rocket anywhere on Earth using multiple satellite constellations and class-leading signal sensitivity.
Up to 80km altitude.
Time-To-First-Fix under 1 minute.
Rocket state detection
will notify you apogee, successful (or not) parachute deployment, balistic impact zone and touchdown.
Auto channel switching
on frequency occupancy, with an optionnal ultra long range unrestricted mode.
TheThingsNetwork®
supported to track Reperix at high altitudes almost anywhere in the world.
Voice synthesizer
will continuously speak telemetry data so you can look at your rocket instead of the screen.
World-scale 3D map
will draw the flight trajectory and guide you to your rocket with ease using your smartphone location.
Easy setup
of your SteadyBlue ground station and Reperix’s parameters, all remotely.
Easy BlackBox download
containing all the data, after your flight, via the usb connector.
Flight replay
shows key flight data, plots, and retraces the trajectory.
Data export
to .csv and .kml files, for more detailed analysis.
Firmware updates
to always fly with the latest best features.
Hardware specifications
Show hardware specs

download blueprint download 3D model
Weight (tracker alone): 5.9 grams
Telemetry range with default antenna & radio settings:
- At touchdown (> 30m above ground): 10 to 15km
- Up in the air: 20 to 50km
- On ground: about 1km
Choosing and connecting a battery
Show how to
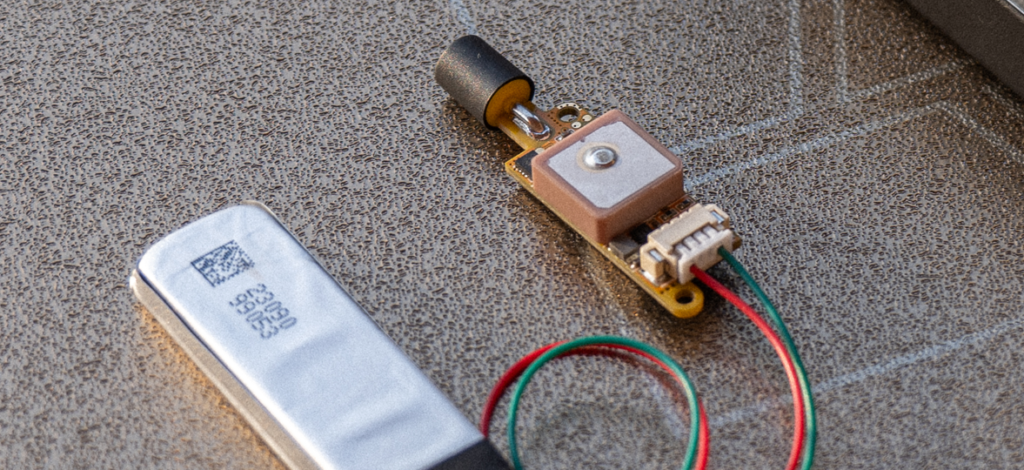
The battery connector is non-standard. It is a JST-PH 4-pin, 1.25 mm pitch connector, used for both USB and battery connections.
The kit includes three spare connectors, already fitted with positive (red) and negative (green) wires.
To connect your battery, you will need to solder a Reperix connector to it, either by modifying the battery directly or by creating a custom harness.
- Input voltage range: 2.8 V to 16 V
- Maximum power consumption: 200 mW
Typical current consumption:
- With a 1S LiPo battery (3.7 V nominal):
200 mW ÷ 3.7 V ≈ 54 mA
A 1S 200 mAh LiPo (minimum recommended) provides about 3–4 hours of operation. - With a 2S LiPo battery (7.4 V nominal):
200 mW ÷ 7.4 V ≈ 27 mA
⚠️ The board includes reverse polarity protection, but it is strongly recommended to double-check wiring before connecting a battery.
The SteadyBlue ground station
Show operating details
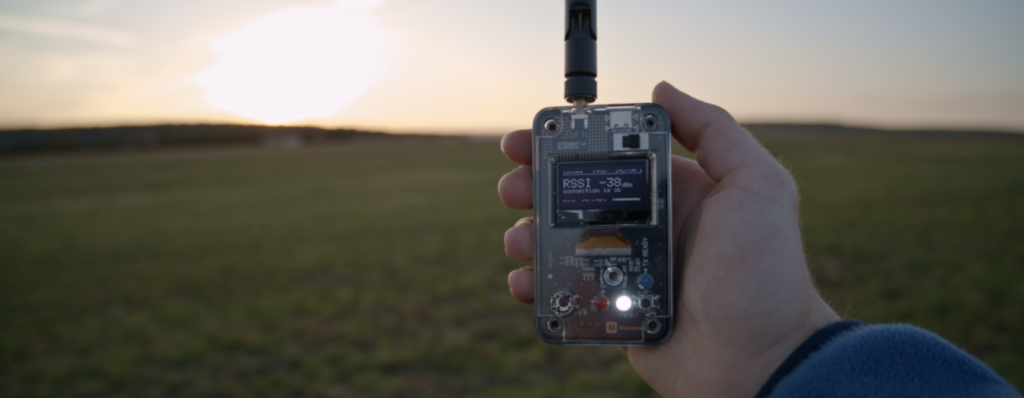
The SteadyBlue Ground Station is the tool used for receiving data from the Reperix tracker. It essentially acts as a two-way radio relay for your Android or iOS smartphone.
SteadyBlue is also Bluetooth-enabled and battery powered, designed for seamless integration with the Reperix Tracking application and autonomous operation.
On the top of the ground station, you’ll find a USB C connector used to connect to your PC and charge the battery, as well as a 2-position switch.
OFF➔ON: To turn on the ground station, slide its switch to the right.
In its resin casing, the body of SteadyBlue measures 5 by 9 by 2 cm and weighs less than 80 grams – fit perfectly in your pocket. By default, it is shipped with a low gain omnidirectional antenna of 20cm that will screw into the top standard SMA connector.
Once powered up the ground station can sustain operation continuously for about 20 hours and will charge as soon as connected through USB, from 0 to 100% in an hour.
Battery percentage is displayed on the idle start screen, and clicking the button will show its real voltage.
SteadyBlue doesn’t need any pairing procedure to be connected to your smartphone, the Reperix Tracking mobile app will automatically search and link to it. When the device is powered up, it goes into a waiting state and will automatically come out of it when you connect it to the application.
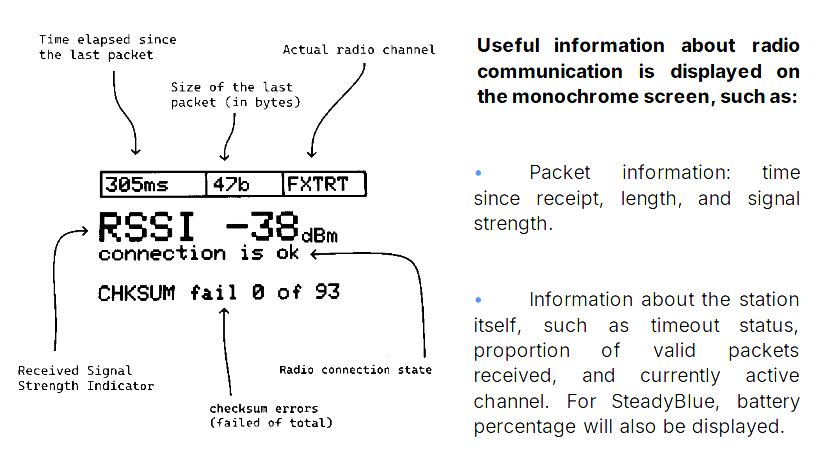
To use several Fluctus at the same time, the Reperix<->SteadyBlue communication system has 26 independent channels (Alpha, Bravo, Charlie…. Zulu) that you can select from. When a communication has been started and no packet has been received for 5 seconds, the connection status goes to “timeout”.
By default, it operates using LoRa 915Mhz modulation exchanging data at 390b/s, on a 500khz radio bandwidth. Each channel is 1Mhz wide.
The frequency (in MHz) of a channel (from 0 to 25) is equal to: 𝟗𝟎𝟐.𝟓 + 𝒄𝒉𝒂𝒏𝒏𝒆𝒍. If using the European EU868-P band, only 2 channels will be available: Alpha (869.4625Mhz) and Bravo (869.5875Mhz).
The RSSI, which stands for Received Signal Strength Indicator, is a numerical value that represents the received signal strength, in dBm (decibel-milliwatt).
The higher (closer to zero) this value, the stronger the signal received.
When a packet is ready to be sent by radio from the ground station to the tracker, it is placed on hold (indicated by the blue LED) and will be sent as soon as the next communication from the tracker is received. This avoids any risk of radio “collision” and guarantees optimal communication.
Connecting to the tracker
Show instructions
- Install the Reperix Tracking app here. Available for both Android and iOS.
- Open the app and allow the asked autorizations. Rudimentary internet connection is required for downloading and displaying the map.
- Power on the ground station. Toggle its switch to the right.
- In the app, the ground station should appear in the device list.
- At the top of the screen, select the channel you want to listen on. Alpha is the default.
- Tap the ground station in the list to connect. You should land on the screen that waits for the tracker signal.
- Power the tracker as described in the previous section. On power-up the LED blinks once green for initialization, then:
Red: error
Yellow (blinking): waiting for GPS fix
Green (blinking): GPS fixed, ready to fly
- After the GPS fix, the tracker position appears on the map. If prompted, allow the app to access your phone’s location.
A minimum of 4/12 received satellites is required for GPS postion fix. If GPS fix can’t be achieved after a few minute of power up, follow these recommendations:
- Place the tracker outdoors with a clear view of the sky.
- Keep it elevated, not directly on the ground.
- Do not cover the square ceramic patch antenna.
- Avoid power lines and tall buildings.
- For signal details, see the app’s Satellites tab (next section).
The application
Menu and tab details
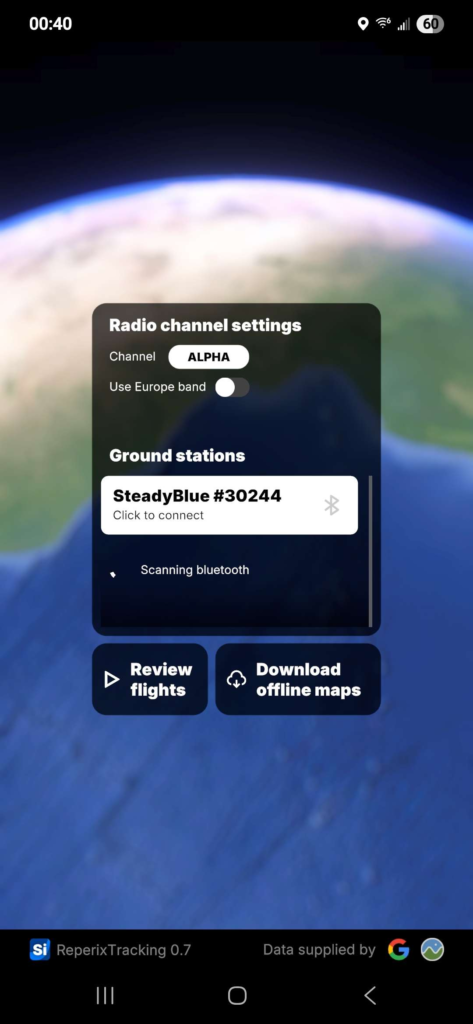
Home menu
The Home tab get you access to the list of the detected nearby ground stations, as well as the selection for your tracker channel settings. To connect to a G.S., tap on it.
Flight review and offline map region download are also available through this start menu.
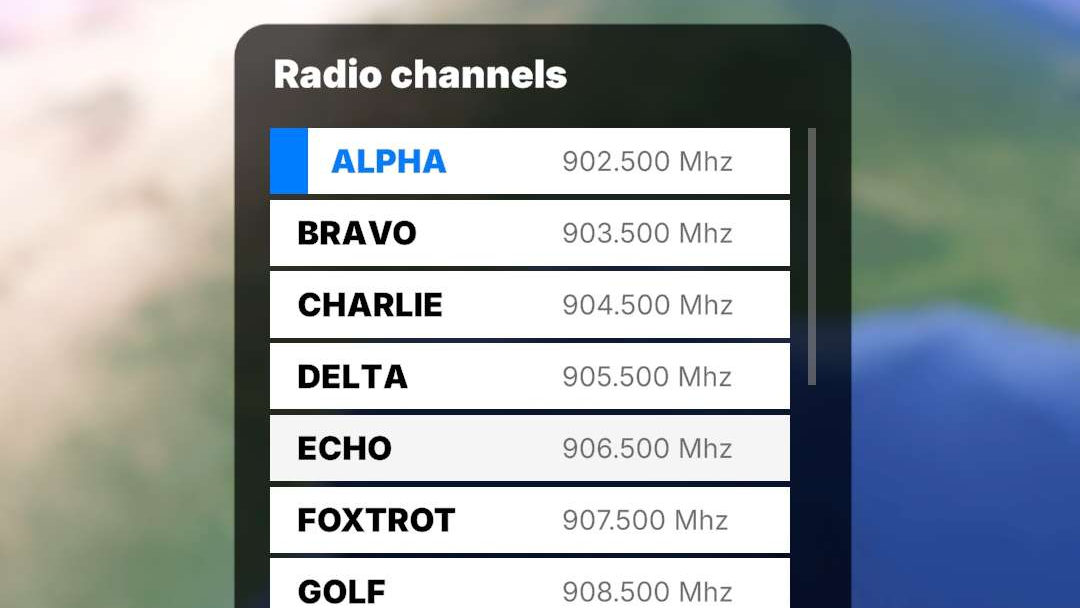
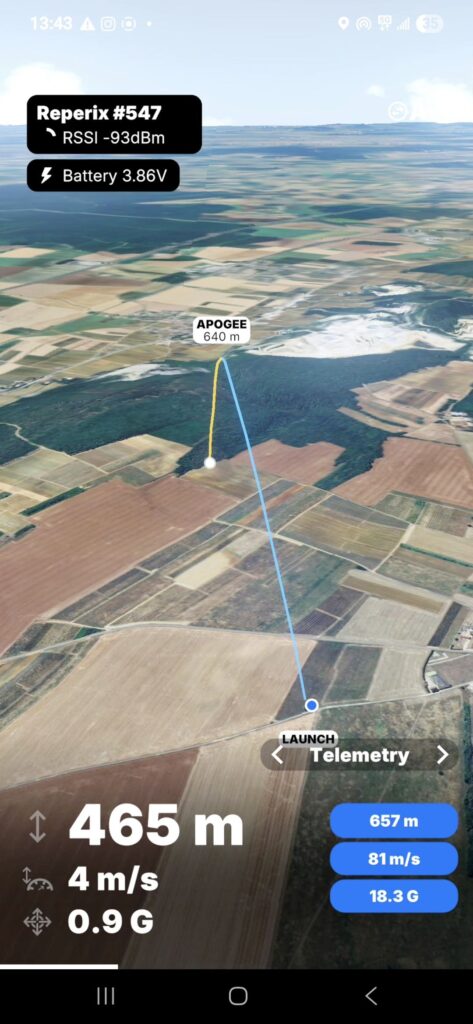
Tracking interface
Once you are connected to the ground station, receiving the signal from your tracker, and with achieved GPS fix, the position of your rocket and yours will be displayed on the 3D map.
Swipe to rotate and pinch to zoom.
The flight path and statistics will be automatically drawn at liftoff; no action is required from the user.
Ground station signal info and tracker voltage are shown at top left, channel settings are accessible at top right, and the bottom section is filled with 4 different tabs. Swipe right or left to navigate through them.
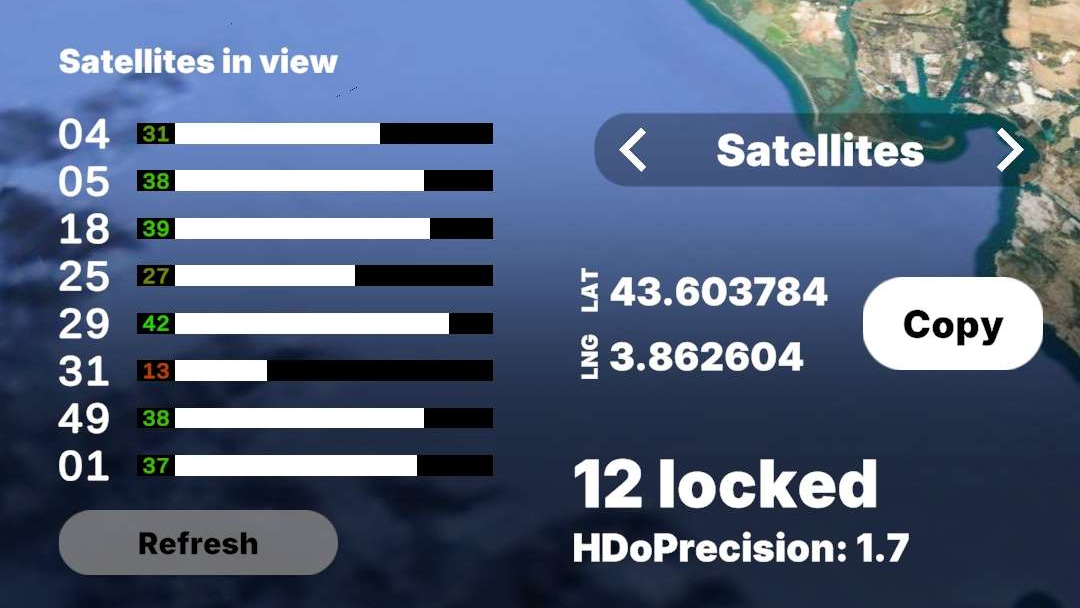
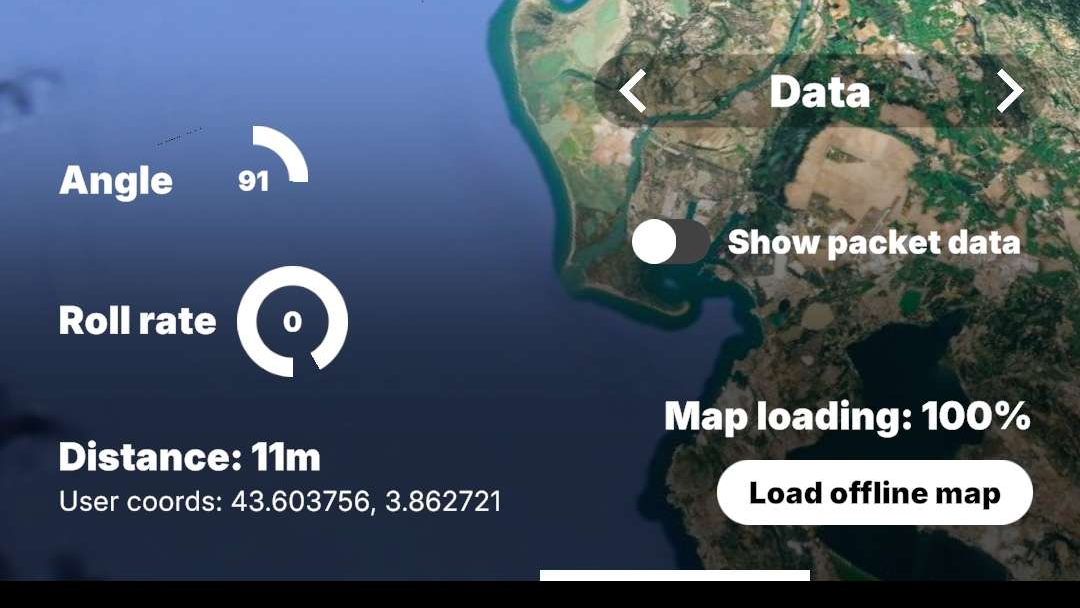
Tab details
The Satellites tab lets you see how many GPS satellites are locked (12 maximum), copy coordinates, and get a view on the quality of the received GPS signals (> 40dbHz optimal).
The Data tab lets you see the current angle (relative to horizon) and roll rate of the tracker, distance to it, as well as loading map region data for offline use.
Changing the tracker radio channel
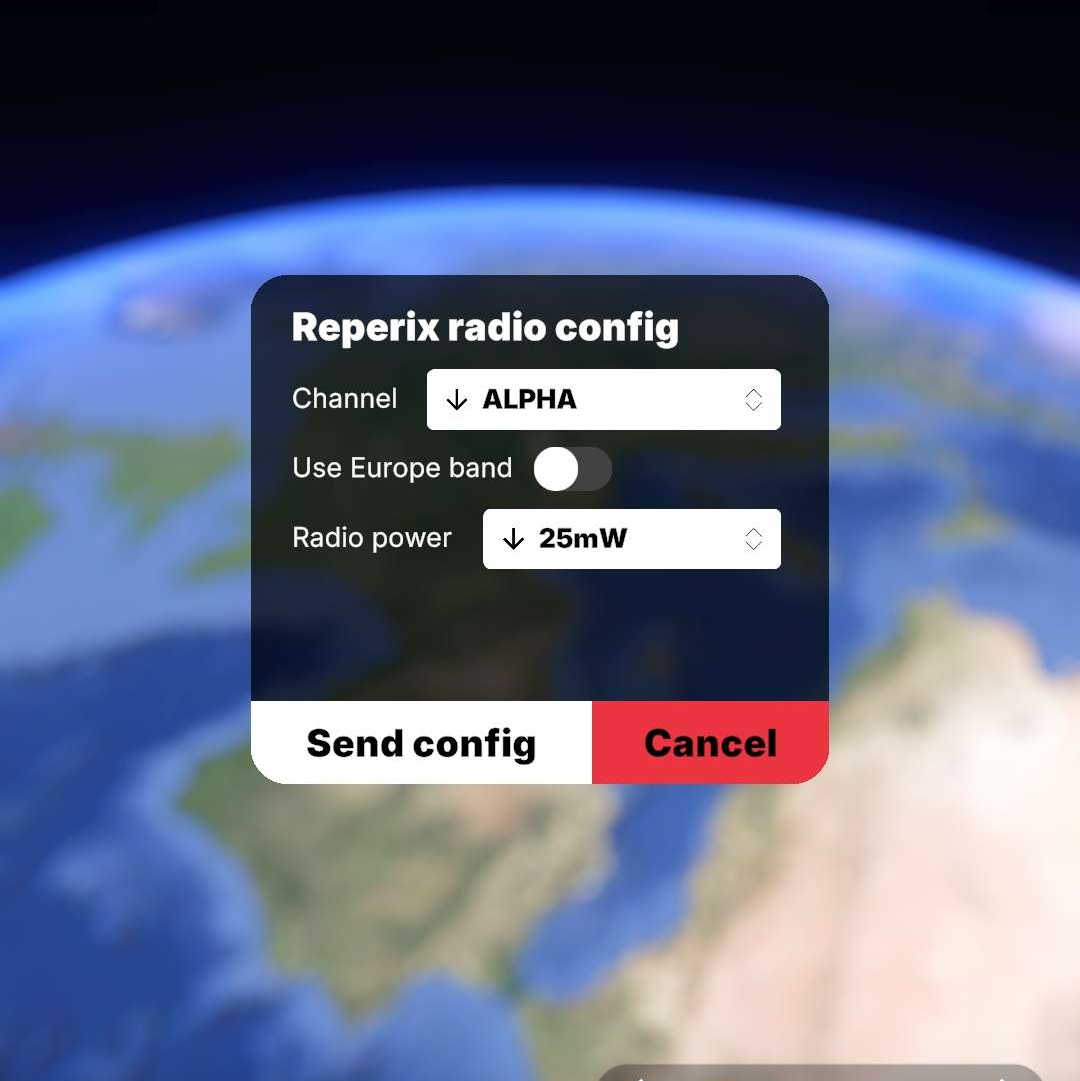
To change the radio channel or settings the tracker is currently using: connect to it, and then tap on the channel icon at the top right of the interface. This will open the config menu.
By sending the config, the tracker will reboot, and the ground station will briefly disconnect from your smartphone to restart on the new selected channel.
Telemetry logging and replay
Flight data is recorded in two ways:
First, the application records all packets received during a flight so that you can review the data and trajectory immediately afterwards under the same conditions.
The tracker also records data in its internal memory at a higher speed and with some additional details (e.g., quaternion orientation). This data must be downloaded after the flight via the tracker’s USB interface and can be exported for analysis in a spreadsheet program. See more in the next section.
To review a past flight, go to the main menu and tap the Flight Review icon. Then, select the desired telemetry session that corresponds. Tapping the share icon will copy the CSV telemetry data to your clipboard for further analysis or reimport.
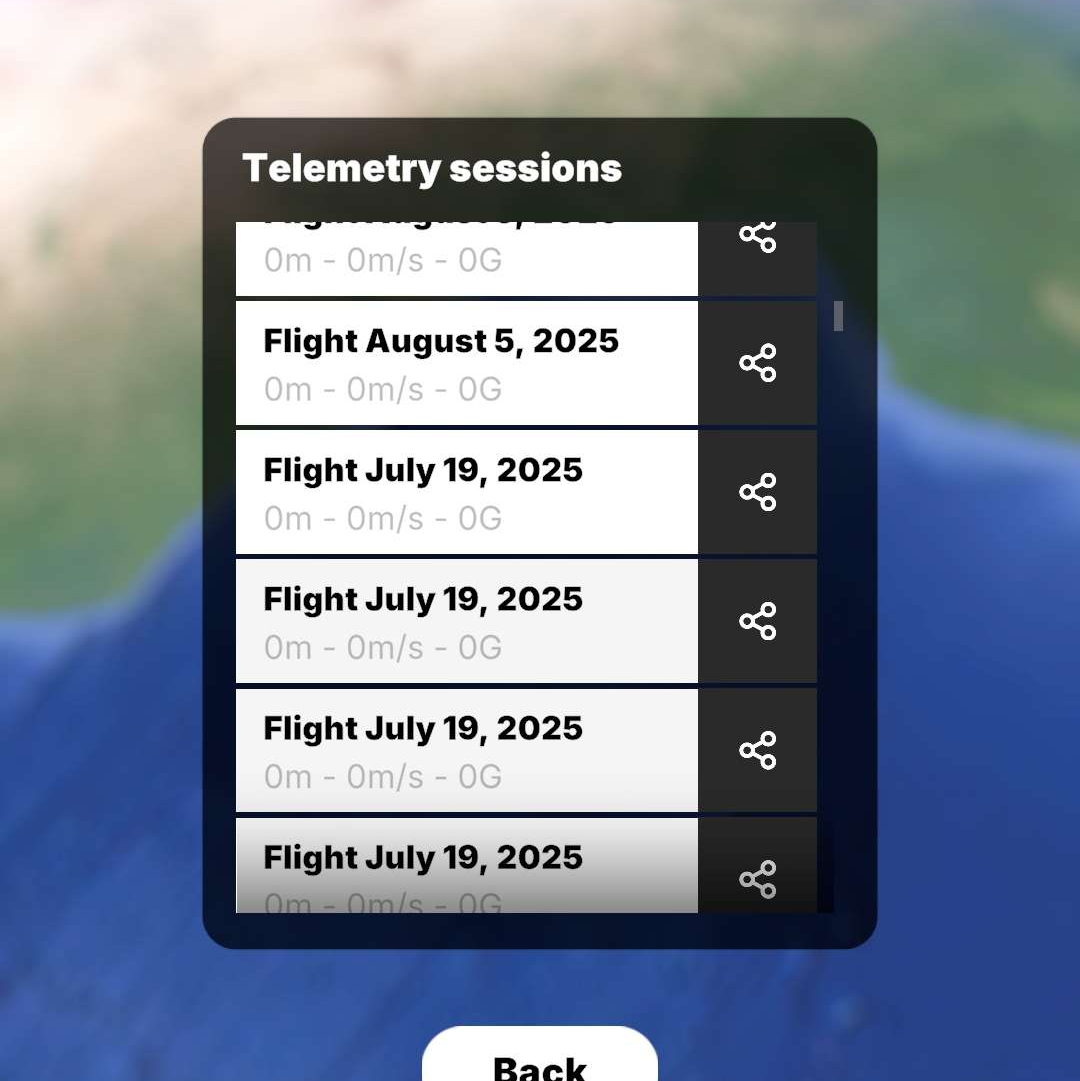
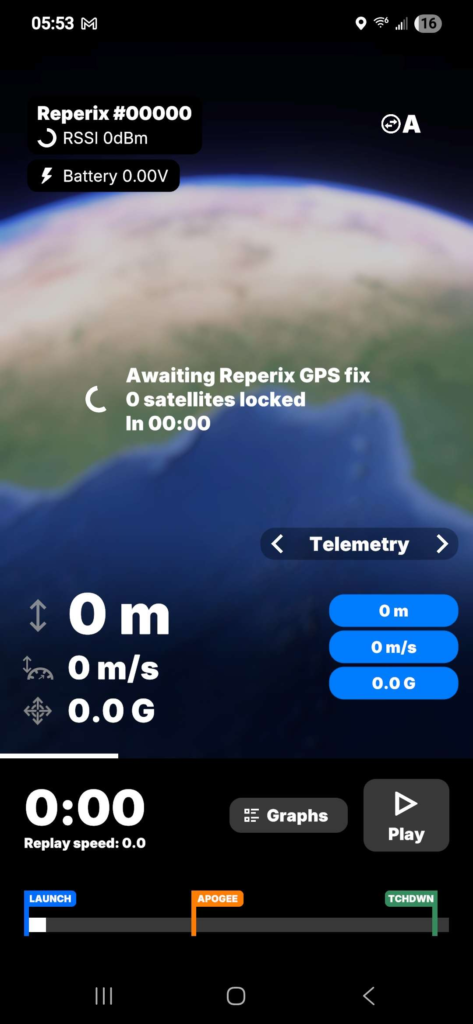
Flight reviewer interface
Coming soon in 1.0…
Flight data
Downloading the internal BlackBox data
- Use the 4-pin USB cable from the box. Connect the Reperix to your computer.
- Chrome is required. Use Google Chrome.
- Open:
https://silicdyne.net/reperixtools/tools.html - Click Connect to Reperix.
- In the pop-up, select the correct USB device, then Connect.
- Click Download Blackbox to transfer the data.
- Export as CSV or KML trajectory as needed.
BlackBox behaviour
Records at 4 Hz until T−2 s before takeoff (circular buffer).
Switches to 10 Hz during ascent.
Drops to 4 Hz on descent.
Stops 30 s after touchdown or when memory is full.
Logged fields:
| Field | Unit |
|---|---|
| time | ms |
| gpsLat | ° |
| gpsLong | ° |
| gpsAlt | m |
| gpsSpeed | m/s |
| gpsSatsCount | count (-1 when no fix) |
| gpsHDOP | — |
| sysstt | boolean array |
| accX | m/s² |
| accY | m/s² |
| accZ | m/s² |
| spdXWF | m/s |
| spdYWF | m/s |
| spdZWF | m/s |
| qtW | — |
| qtX | — |
| qtY | — |
| qtZ | — |
| angle | ° |
| accglob | m/s² |
| status | — |
Updating softwares
Show instructions
- Download the latest .bin from silicdyne.net/archives → Reperix firmware.
- Open https://silicdyne.net/reperixtools/tools.html in Google Chrome.
- Select the downloaded .bin file.
- Tick Erase full memory, then click Update.
- In the Chrome pop-up, choose the correct USB device and confirm.
- A few seconds later the pop-up will reopen. Select STM32 Bootloader.
- Wait for the process to finish, then unplug and replug your Reperix.
New updater: https://silicdyne.net/firmwares.
